- source: project
  quarto-pub:
    - id:                                  # leave the id blank
url: # leave the url blank17 Publish Your Report to Quarto Pub
Abstract
This guide guides researchers through the process of creating a Quarto Pub website using your Binghmamton University Google account. Follow each step carefully to ensure your report is published correctly.
Keywords
quarto pub, personal website, publish
Tip📖 resources
17.1 Before You Begin
Make sure you have:
A working Quarto project in Posit Cloud.
An active Quarto account linked to your school Google email.
- Sign in to Quarto pub with your school email account using google sign in.
Your
_quarto.ymland_publish.ymlfiles are in your project folder on Posit Cloud- You can download these files from 306 Quant Track drive
17.2 Prepare the _publish.yml File
In your _publish.yml file, add the following code (if not already present):
⚠️ Do not manually add or paste any token here.
Tokens are automatically handled by Quarto during the publishing process.
17.3 Publish from the “Terminal”
Following the step by step process, and you can publish your report to your own Quarto website!!
17.3.1 Step 1: Under Terminal
Click the tab for Terminal (between the Console and Background Jobs tabs) in Posit Cloud (you should see something like
/cloud/project).Type the following command and press Enter:
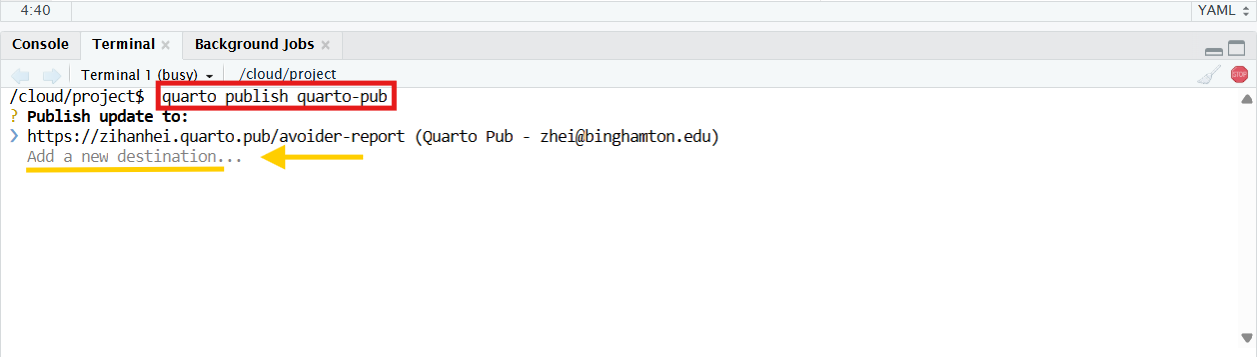
quarto publish quarto-pub- Next, When prompted with “Publish update to:”, click Add a new destination…
(see the Figure 17.1 below):
17.3.2 Step 2: Authorize Your Account
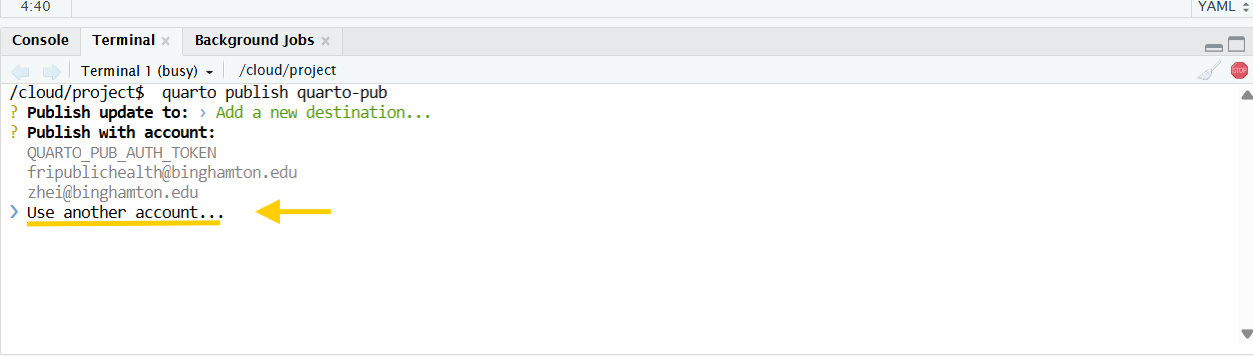
Under “Publish with account:” section choose “Use another account…” (see the Figure 17.2 below)
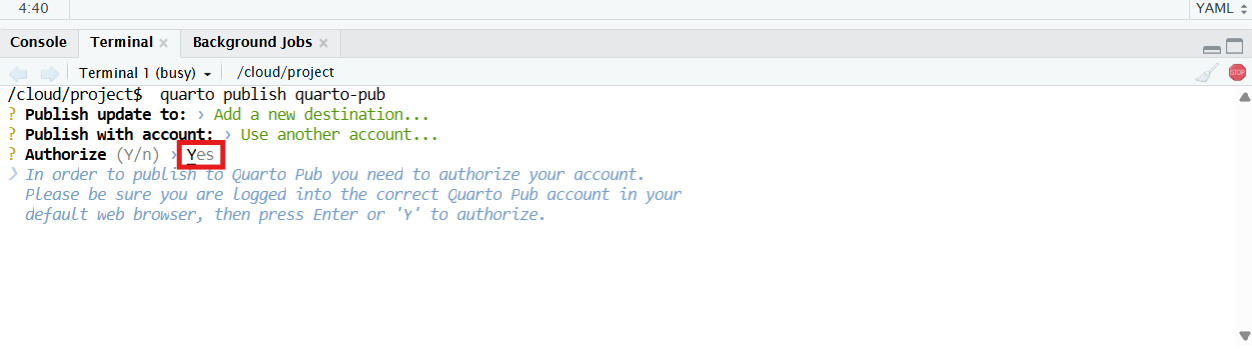
Next, the system will ask to authorize your account in order to publish to Quarto Pub. In the Authorize (Y/n) section, type “Y” for Yes. (see the Figure 17.3 below)
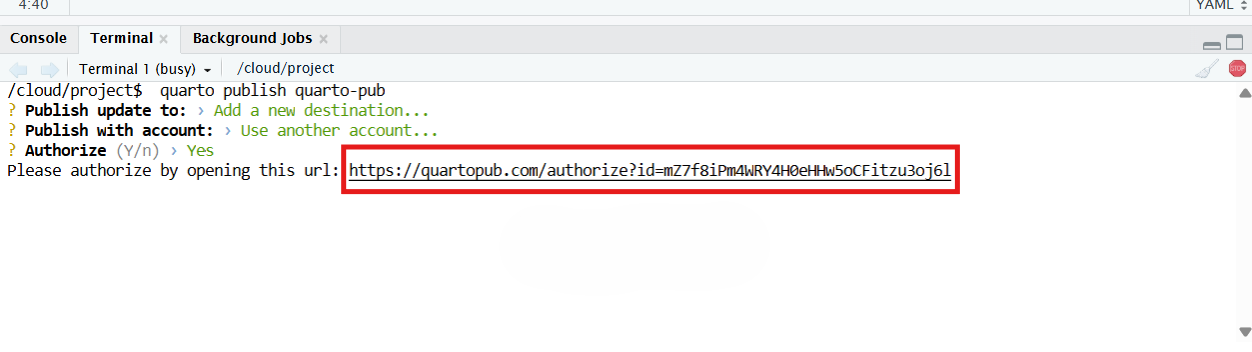
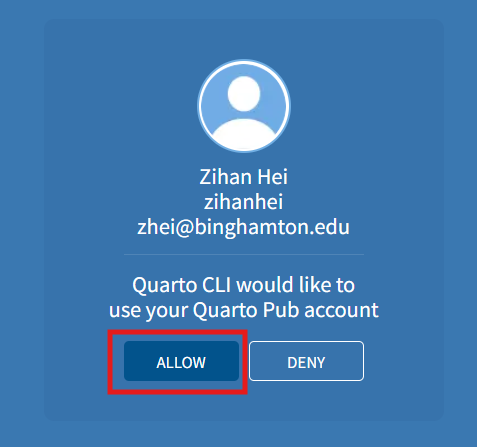
In addition, you will get an url, click it and you will see your quarto account, click “ALLOW”, this way you allow to publish into quarto. (see the Figure 17.4 and Figure 17.5 below)
17.3.3 Step 3: Name Your Website
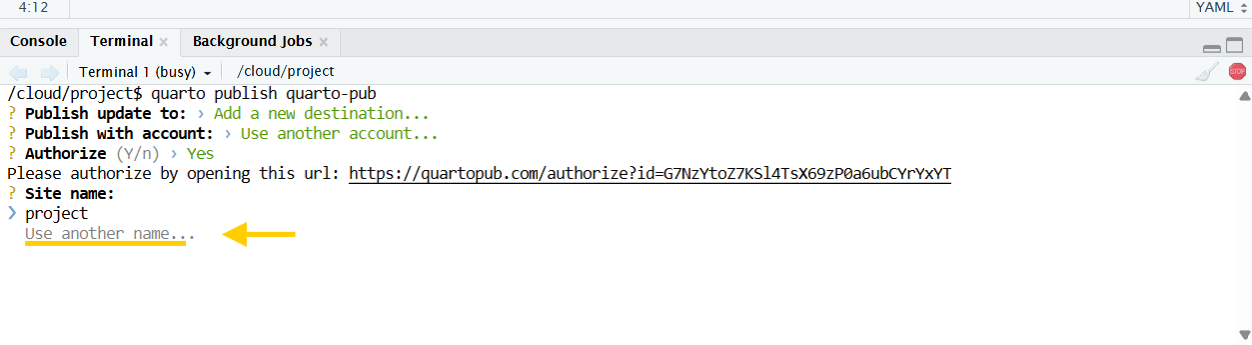
When prompted for “Site name:”, scroll down to “Use another name…” (see the Figure 17.6 below)
Next, in “Publish with name” section, enter a short name for your report. (see the Figure 17.7)
different examples:
e.g., zerosum
e.g., safety-report
e.g., avoider-report
Your short name will be in the URL link when you publish (e.g., https://zihanhei.quarto.pub/avoider-report/)

17.3.4 Step 4: Confirm and View Your Website
Once publishing completes successfully, you’ll see a message in the terminal with a link to your new Quarto Pub website. Click the link to open your published report!
17.4 Troubleshooting and Tips
If you receive an authorization error, sign out of all Google accounts, then log in again with your school email.
To update your site later, simply run:
quarto publish quarto-pubYour
_publish.ymlshould never contain tokens or IDs you did not generate yourself.To delete a published site, go to your Quarto Pub dashboard and remove it manually.