# Remove all objects from the global environment
rm(list = ls())6 Find the Ref
How to start and end every coding session
Abstract
This chapter introduces Ref the Raccoon, the referee of this playbook, and the routine he runs at the start and the end of every coding session. Researchers learn the six steps to reopen their RStudio Project and get their data, packages, and variables back, the four steps to finish a work session and back up their files to their ELN, how to fix the problems that most often appear at the start of a session, and where Ref shows up in the rest of the playbook (The Play, The Lab, and Your Turn). Use this chapter at the start of every lab and every time you sit down to work on your report.
Keywords
Ref the Raccoon, RStudio project, routine, load library, environment, backup, ELN, troubleshooting
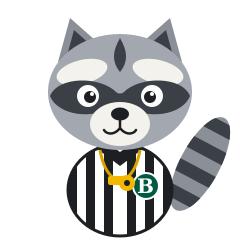
Meet Ref. I am Ref the Raccoon. A referee is there to keep the game fair and to help you play it right. Find me first, every time you sit down to code, and find me last, before you leave. This chapter is my routine. It takes about a minute at the start and a minute at the end, and it prevents most of the problems that stop people in their tracks.
6.1 Why you need this chapter: the kitchen
Think of RStudio as a kitchen.
| In the kitchen | In RStudio |
|---|---|
| The recipe | Your code, saved in your .qmd file |
| The groceries in the pantry | Your data files, saved in your project folder |
| The countertop while you cook | R’s memory (the Environment tab): loaded packages, imported data, new variables |
When you close RStudio, the countertop is wiped clean. The recipe and the groceries are still there. Your files are safe. The countertop is not. That is on purpose, for two reasons.
1. Leftovers ruin the dish. While you cook, the countertop fills up: a sauce you made before you fixed the recipe, or an ingredient from a step you later crossed out. If you keep cooking with what is on the counter, the dish can taste fine and still not match the recipe. In R, a plot or a statistic can look fine and still not match the code in your file, and R will not warn you. When you start with a clean counter and cook from the top of the recipe, every result comes from the code that is actually written down.
2. Someone else has to cook it, too. Your teammate, your peer mentor, and Dr. Shane do not have your countertop. They only have your recipe and your groceries (your .qmd file and your data file). If they follow the recipe in their own kitchen, they should get the same dish: the same plots and the same statistics. That is what reproducible means. A recipe that only works with yesterday’s leftovers is not a recipe, and next month you will not be able to cook it either.
ImportantImportant: Clean counter, cook from the top
Every time you sit down to work, start with an empty Environment and re-run your code from the top. It takes about a minute, and it proves that your work is reproducible.
6.1.1 How to clean the counter
Objects from earlier work (alldata, select_data, VARIABLE1) stay in the environment tab until you clear them. If you turned off “Restore .RData” in R Software, the counter is already clean every time you open RStudio. During a session, there are two ways to wipe it:
- Session > Restart R. This is the cleanest option: it empties the environment and unloads every package, so what happens next is exactly what a render will see.
rm(list = ls())in the console. This removes every object but leaves packages loaded. Use it when you want a quick reset without restarting.
Then run your load-library chunk and continue from the top.
6.2 Once per computer
You did most of this when you first set up your computer. You do not repeat it each time.
- Install R and RStudio (R Software)
- Create your RStudio Project,
Lastname_FRI - Run your
install.Rfile to install your packages (R Packages) - Know how to create a
.qmdfile with its load-library chunk (Start a Report). Your first real one isLastname_lab2.qmd, made at the start of Lab 2; there is no Lab 1 file. You make one file per lab, not per session. - Create a folder called R Labs inside your individual ELN (your Google Drive folder). In Google Drive, open your ELN and click + New > New folder.
6.3 Ref’s kickoff: every time you start RStudio
- Open your project, not a file. Find your
Lastname_FRIfolder and double-clickLastname_FRI.Rproj. (Or, in RStudio: File > Open Project…) - Check that you are in your project. The project name
Lastname_FRIappears in the top right corner of RStudio, and the files tab shows your data file and your.qmdfiles. - Open the
.qmdfile you are working on by clicking it in the files tab. - Run your load-library chunk. It is the first code chunk in your
.qmd. Click the green ▶ arrow in the top right corner of the chunk. - Run everything above where you stopped. Click inside the chunk where you want to start working. Then click the Run All Chunks Above button (the gray ▼ with a line under it, next to the green arrow). Your data and variables are now back in the environment tab.
- Keep going. Start writing and running code where you left off.
GoGo: Starting a new lab? Make a new file first
The six steps above are for a day when you continue a file you already started. On the first day of a new lab there is no file to open yet. Do steps 1 and 2, then create and name the new .qmd file (Lastname_lab2.qmd for Lab 2, and so on) and paste in your load-library chunk exactly as in Start a Report (the previous chapter). Save it, check that it appears in the files tab, and pick up at step 4.
6.4 Ref’s final whistle: before you quit RStudio
Keep counting. Steps 7 to 10 finish your session and back up your work.
- Save your
.qmdfile (Cmd + S on Mac / Ctrl + S on Windows). If the file name at the top of the script editor is red with a *, it is not saved. - Render your
.qmdfile. To render means to turn your.qmdfile into a finished report. Click the Render button, the blue arrow at the top of the script editor. R then starts with an empty memory, runs all of your code from the first line to the last, and builds a report (a web page) with your writing, your plots, and your results. It can take a minute, and the report opens when it is done.
- If the report appears, your code works from top to bottom. You will be able to pick up next time without surprises.
- If it stops with an error, that is useful, too: it shows you the first line that does not work. If you cannot fix it today, type a note to yourself at that spot, starting with
#(for example,# FIX: error on this line, object not found), so you know where to start next time.
- Back up your files to your ELN. Open your individual ELN (your Google Drive folder) in your browser and open your R Labs folder. Click + New > File upload, go to your
Lastname_FRIproject folder, and select the files you worked on today: your.qmdfiles and your.Rfiles (such asinstall.R). You can also drag the files from your project folder into the browser window. If Google Drive asks what to do with a file that is already there, choose Replace existing file. Google Drive keeps the older versions for you. - Quit RStudio. If RStudio asks to save your workspace, choose Don’t Save, because the workspace is the countertop, not the recipe. It holds the leftovers from today: your datasets and variables, including any made by code you later changed or deleted. If you save it, R puts those leftovers back the next time you open RStudio, and your results may no longer match your code. Your
.qmdfile and your data file are already saved, and they are all you need to make everything again.
CautionCaution: Save your file before you close RStudio
RStudio does not save your .qmd or .R file for you. If the file name on its tab is red with a *, your latest changes exist only on the screen, and closing RStudio throws them away. Two different questions come up when you quit, and they need opposite answers.
Do this
- Press Cmd + S (Mac) or Ctrl + S (Windows) every few minutes, and always before you Render. The file name on the tab turns black when it is saved.
- Before you quit, click File > Save All.
- If RStudio asks “Save changes to report.qmd?”, click Save. That question is about your file.
- Copy your
.qmdand.Rfiles to your ELN at the end of every session (Find the Ref).
Do not do this
- Do not close RStudio, or your laptop, while a file name is still red.
- Do not click Don’t Save when the question names a file (
report.qmd,install.R). Only the question about the workspace (.RData) gets Don’t Save: the workspace is leftovers, and your file is the recipe. - Do not rely on Render to save for you. It usually does, but only for the file you rendered, and only if the render starts.
ImportantImportant: Close the project, reopen it, and run everything before you submit
Code that worked while you were editing can still fail from a clean start, because something you ran earlier by hand (a package, an object, a data file in the wrong place) was propping it up. Before you submit your RD Report or Final Report, and before you publish it, prove that it runs on its own:
- Close the project: File > Close Project. If RStudio asks about the workspace, choose Don’t Save.
- Open the project fresh: double-click
Lastname_FRI.Rproj. The environment tab should be empty. - Run all of the code from the top. For a
.qmdreport, click Render; it starts a fresh R session and runs every chunk from the first line to the last, the same job Source does for an.Rscript. - Check the result. The report should open with every plot, table, and number in place, and the console should show no errors. If it stops, fix the first error, then start again from step 1.
Only when a fresh run works from top to bottom is the report ready to submit and publish. If it works on your computer this way, it will work on your peer mentor’s or Dr. Shane’s.
ImportantImportant: Your ELN is your backup
Laptops get lost, broken, and replaced. Your individual ELN is a Google Drive folder that does not. Get in the habit of backing up to your R Labs folder at the end of every work session, not only when something is due. A backup takes less than a minute. Redoing a lab or a report takes hours.
6.5 If something goes wrong when you come back
| What you see | What it means | The fix |
|---|---|---|
could not find function "read_excel" (or another function) |
The package is not loaded in this session. | Run your load-library chunk (step 4). |
object 'alldata' not found |
R forgot the object when you closed RStudio. | Run All Chunks Above (step 5). |
cannot open file ... No such file or directory or path does not exist |
R is looking in the wrong folder, or the file is not in your project. | Check step 2. If the project name is missing in the top right corner, you opened a file and not the project. Go back to step 1. |
there is no package called ‘psych’ |
The package is not installed on this computer. | Add the package to your install.R file and run install.R again. Then run your load-library chunk. |
| The files tab does not show your files | You are not in your project. | File > Open Project… and choose Lastname_FRI.Rproj. |
| Your laptop is lost or broken, or a file is gone | Your project folder is gone, but your backup is not. | Download your files from the R Labs folder in your ELN into a new Lastname_FRI project. |
Still stuck? Restart R (Session > Restart R) and start again at step 4. A fresh start fixes more problems than you would expect.
6.6 Ref’s Quick Checklist
The whole routine on one line each. The first row happens once; the next two happen every time you code. Every coding chapter from here on opens and closes with a gray Ref box that links back to this list.
| Step | Do | |
|---|---|---|
| 🛠️ | Once per computer (not every session) | Install R and RStudio → Create Lastname_FRI project → Source install.R. Source it again only when a chapter adds a new package, or R says there is no package called ... |
| 🏁 | Kickoff | Open Project (Lastname_FRI.Rproj) → Open .qmd → Run load-library chunk → Run All Chunks Above → Code |
| 🔔 | Final whistle | Save (Cmd/Ctrl + S) → Render → Back up to ELN (R Labs folder) → Quit, Don’t Save workspace |
| 🚑 | Something wrong? | Session > Restart R, then start at the kickoff. Still stuck: the table above. |
6.7 Where you will find Ref in this playbook
Most chapters that use data have the same three sections, and you will go through them with three different datasets.
| Section | Dataset | What you do |
|---|---|---|
| The Play | an example dataset | Watch the play. Read the code and the output, step by step. |
| The Lab | the lab dataset | Run the play. Try it yourself during your R Lab, then check your own work. Labs are not graded. |
| Your Turn | your team’s dataset | Call your own play. After you finish all of the R Labs, come back and run the play for your own research questions. |
Ref does not talk all the time. Look for him in these places:
- Ref’s kickoff opens every coding chapter and The Lab, and Ref’s final whistle closes them. They are one-line reminders that link to the Quick Checklist above.
- Ref’s check boxes in The Lab show you the answer you should get, so you can check your own work. Try the play first, then open the box.
- A foul is a mistake that gives you a wrong answer without any error message. These are the mistakes you cannot catch on your own, so Ref blows the whistle.
- In Your Turn, there is no Ref. It’s game time! You run the play with your own data and check your own work with the same checklist your peer mentor and Dr. Shane use.
6.8 You’re the quarterback
Ref calls the fouls, but Ref does not run the plays. You do. In this playbook you are the quarterback: the person in charge of carrying out the plan. Your peer mentors and Dr. Shane are your coaches. We wrote the playbook, we run the practices (the R Labs), and we are there to help. But a coach cannot play the game for you. When it is time to import your team’s data, build a composite, or run a model for your RD Report, you are the one who decides what to do and does it. The playbook shows you how; only you can do the work.
That takes a certain mindset. Coding is a way of thinking, not a list of commands to memorize. You will make mistakes, and that is normal: an error message tells you what to fix. It is not a judgment of whether you can do this. Every mistake in this playbook is correctable, and most take one line. You will also try things that do not work: a plot that does not show what you meant, a recode that puts people in the wrong group, a chunk that runs but answers a different question. None of that is wasted. Each one teaches you what the code actually does, which is exactly what you need to know.
You are not doing this alone. Come to R Lab with your questions, the error message on your screen, and the thing you tried. Check in with your peer mentor coaches when something is not working and problem-solve together; that is what lab time is for. Do not sit stuck for an hour on your own when three minutes with a coach would get you moving again. Ask early, ask often, and then go do it yourself.